Testing the Waters
A weekend workshop like Zenith Aircraft's sheetmetal course lets you try before you buy.
BY LEROY COOK
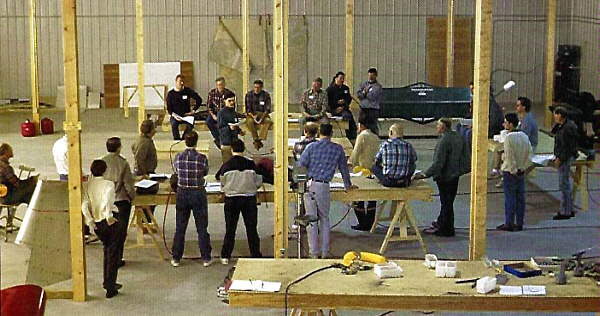 |
| Production Manager Nicholas Heintz conducts an introductory briefing for participants in Zenith Aircraft's weekend workshop. |
The proliferation of complete airframe kits in the last 20 years has completely changed the character of the homebuilt aircraft movement. These kits - in some cases even including a prepackaged engine installation - eliminate the hours wasted hunting materials, fabricating brackets and measuring bolt threads for the umpteenth time. Convenience has a price, of course. Whenever you ask someone else to do part of your work, the out-of-pocket expenses rise accordingly. But, if you count the worth of all the time saved you'll probably find that a kit aircraft is cheaper than a plans-only project, and it's sure easier to follow a step-by-step builder's manual than to match bits and pieces in a random sequence.
Even so, ordering an airplane kit is a big step. You'll be committing yourself to a box of parts worth the price of a new automobile, and you may not be totally sure you can handle it. First-time builders are plagued with nagging fears: What if they're not be able to rivet metal, or lay up glass cloth, or dope fabric, or assemble a glue joint? Many persons interested in a custom-built set of wings have built nothing more complicated than a birdhouse. Advertising license being the most prolific form of prevarication in the literary world, an implied promise that you can "be flying after 300 hours of spare- time fun" might not hold true if you're the klutzy type.
So, how can you know, before you fork over the dough? The best answer is to put in some time at homebuilding workshops. Any number of EAA-affiliated shows or meetings throughout the year offer forums, training classes and workshops, covering the basics of skills like welding, riveting, gluing, glassing and doping. Once you're comfortable with the techniques to be-used, you'll feel better about tackling a project that's likely to stretch into years.
Try Before You Buy
Perhaps you've already made a tentative kitplane choice. You think you can work with metal (or wood, tube and-rag or composites) but you're still not certain you want to commit the contents of the family savings account without trying your ability on a small sample of the bigger job. Many of the major kit suppliers have small components available as an initial kit; if you can build an elevator or flap, you can visualize how it will be to complete an entire kitplane. One manufacturer of composite homebuilts once offered a boat kit that used the same technique required to build the airplane. By the time you launched a finished boat hull, you knew you could lay up the airplane.
Even better than ordering a sample kit would be a chance to spend a few days at the kit factory, working on your mini-project under the direct tutelage of the people who produce the kit. A goof can be prevented or rectified on the spot, any replacement parts needed will be available right out of the bin, and you'll probably be working with other first-time builders who are just as nervous as you. More and more kitplane suppliers are offering these workshops, finding they are helpful sales tools. They're also an excellent window through which the company can view the first-time builder struggling with their product. Plans and manuals are frequently updated and clarified after a few public-input seminars. The prospective builder is only committed to the cost of the weekend course, and it results in a completed component that may be used on the actual aircraft if he or she elects to proceed with a full project.
Zenith Aircraft's Workshops
We visited one such weekend workshop last December, held at Zenith Aircraft's kitplane plant in Mexico, Missouri. The Zenith title harks back to designer Chris Heintz's first homebuilt airplane, and is formed of the letters in his last name. The popular Zodiac CH 601 and STOL CH 701 kits are produced in Mexico, Missouri. Frequent weekend workshops are offered to acquaint prospective and "just looking" builders with the Zenair kits.
For a $300 fee, participants can use the company's tools, workspace and fixtures, constructing a rudder for either a CH 601 or CH 701 from the same parts that would be supplied as part of the complete airplane kit. The rudders go home with them at the end of the course, hopefully to become part of their airplane's in due time. If the builder has already purchased a kit and is just getting started, he can bring his own rudder parts to the workshop and attend for a reduced fee. The number of participants is limited to 25, to provide for adequate supervision.
Mathieu Heintz, Zenair's production manager, commuted 700 miles from Ontario to put on the first workshop held at the new plant. His Saturday morning orientation talk covered the philosophy of Zen - Zenair, that is. The kits are purposely kept simple, so that assembly is possible with only hand tools: blind rivet pullers, files, tin snips and hacksaws. There are no rivets to be driven, because that would require two people and an expensive, noisy rivet gun (driven rivets are used in highly-stressed areas like the wing spars, but they are completed at the factory). Only two sizes of Avex blind rivets are used; 1/8-inch and 5/32-inch. Yes, you can use an air-driven rivet puller, Mathieu said, but there's no need to buy one unless you already own an air compressor and want to spend $80 for an air puller instead of $35 for a good hand puller. Zenair's recommended rivet puller is a nicely made Spiralux unit from England.
Zenair uses countersunk-style rivets with a flat head but sets them with a modified puller head that has been given a concave shape by a large drill bit. This draws the flat countersunk rivet into a domed head for greater strength. "These are not pop rivets," insists Heintz. Although the Avex rivets are supplied by the well-established firm of Avdel in Great Britain, Zenair tests each batch to be sure they are up to spec. "You can't use non-AN components without testing for quality," Heintz explains. "A lot of items we receive are rejected, and we have an elaborate quality control system to track each part." Privately, a proud Mathieu Heintz showed me the new bar-code labels that go on kit parts. A scanner's wand picks up the data, which tells when the part was made, the source of the material, and any number of other facts needed for inventory and billing purposes. If a problem shows up after the part is shipped, the affected batch is easily traced by its bar-coded information so builders can be alerted.
| The process begins with piles of rudder parts for either the Zenair CH 601 or CH 701 kit. | 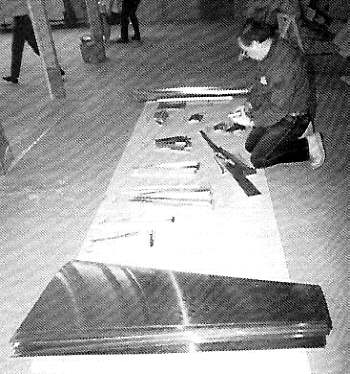 |
Getting to Work
Introduction done, participants filed by the stacked rudder parts and picked up their first pieces: the main spar and a pair of doubler channels to be installed inside it. Even the simplest task can be daunting and time-consuming for a beginner. Heintz showed how to quickly run a center reference line with a felt-tip marker along a straight-edged aluminum component, simply by holding your idle fingers over the edge as you run the pen down the piece. To a builder who had been holding a drill in one hand for 10 minutes while taking repeated, precise measurements of hole locations, Heintz explained that the rivet spacing did not need to be exact, as long as the correct number were used and the holes were not drilled near an edge or bend.
| Mark Beck marks a centerline along a rib with a felt tip pen. | 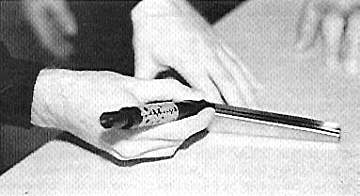 |
To assure compliance with the 51% rule for U.S. homebuilts (Canadian builders enjoy the privileges of an 85%-prefinished Zenair kit), most rivet holes have to be drilled during assembly, in accordance with the supplied plans, using the No. 20 or No. 30 drill bits that give just enough extra room for the rivet to fill the hole. There's no reason to worry about the strength of blind rivets, Heintz said, as long as the component is engineered for them. Basically, this means you might put in twice as many rivets as you would use if higher-strength bucked rivets were holding the parts.
| Jo Anne and Calvin Brockman attended from Oak Creek, Wisconsin, despite Calvin's broken foot that required him to be on crutches. | 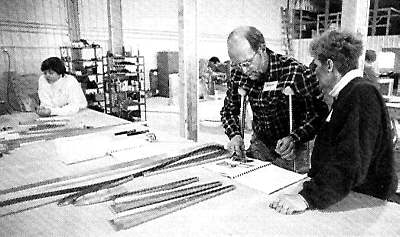 |
A reasonably flat working surface is essential for the assembly of parts, Heintz says, although an industrial-grade flat-steel bench certainly isn't required. The workshop was conducted on Zenair's recommended worktables, 4x8-foot sheets of 1-inch particle board mounted on legs of 2-inch lumber. Larger parts can be Clecoed right to the particle board, a simple and easy way to keep them in place.
After drilling holes in the spars for the doubler, the reinforcing channels were held or clamped in place and matching holes drilled through the doubler. Removing the burrs from hole edges was important, Heintz stressed; leaving a drill burr under a rivet head interferes with the clamping of a rivet. Some of the workshop participants preferred to work alone while others buddied up with a partner and pooled their expertise.
| Builder's choice: hand (plier-type) and air (pistol grip) pullers for blind rivets. | 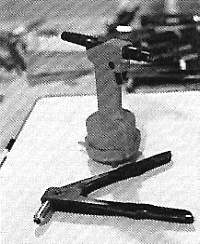 |
As drilling progressed, the neophyte builders were introduced to the wonders of Clecos and the required pliers. An amazing number of individuals had never seen them before and needed to be told that the black ones were for 5/32-inch rivet holes and the copper ones were for 1/8-inch rivets.
Hinge bearings were next. These little fittings had to be cut from aluminum angle stock, shaped and drilled for both the hinge bolt and the rivets attaching them to the spar. Heintz's supervisory manner took on a more serious tone; these are critical, he pointed out. They must be aligned to close tolerance and if not done correctly the tail could fall off. That statement assured devotion to duty. Several of the first attempts flunked his inspection. Precision measurements worthy of a watchmaker accompanied the placement of the hinges onto the spar before drilling took place. Thus are new builders taught where perfection is needed, and where it is not so vital.
| Nick Paldino from Alexandria, Virginia, drills holes for attaching the No. 1 rib to the spar while Leonard Hock of Kansas City, Missouri, holds the parts in alignment. | 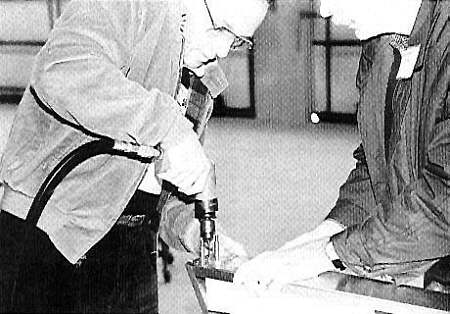 |
Mating the ribs to the spar required drawing alignment marks to locate the rivet holes, trimming flanges, drilling holes in the spar first, then fitting the ribs precisely before drilling through the spar holes for final attachment. The angles formed by the ribs make the box structure rigid and straight, so careful work pays off at this time.
Setting Rivets
At this point, the internal structure of the rudder was complete, but only temporarily held together. Pulling rivets was the next step; it was time to start thinning out the forest of Clecos. A few builders placed their parts or holes wrong and had to reset rivets. As some of them learned, drilling out an Avex rivet is not easy; the steel core deflects the drill bit into the softer aluminum, and you wind up with a large, egg-shape hole and a rivet clinging stubbornly to one edge. Instead, one should drill lightly to remove the head only, then punch the core out with a nail or a piece of clipped-off rivet from the pile on the floor, leaving a nice clean hole for a new rivet. In due course, the aluminum rudder frameworks were complete and the Clecos were once again in a pile on the table.
| Ronald VanSickle (left) and Robert Clark of Richmond, Virginia, contemplate drilling holes in their spar. | 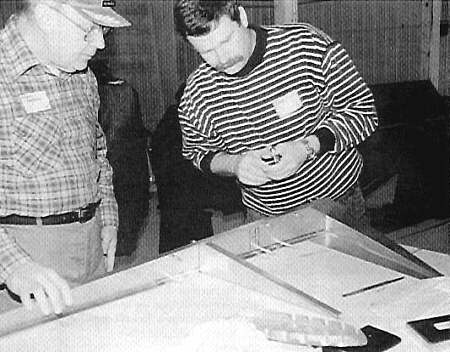 |
Skinning a Tail
Skinning the rudder skeleton was done the following day. Zenair supplies preformed skins, so there is no need for a bending brake, but the metal is purposely oversized, requiring some builder trimming at the bottom of the rudder. Always make two cuts, cautions Heintz; remove the greatest portion of the excess material on a rough cut about a half-inch from the desired dimension, then make a final cut directly along the trim line to complete the job. This avoids fighting a cumbersome flap of metal while doing precise work. Filing edges smooth is the next step, so that a finger run along the sheet will not snag on a burr.
After marking the rib positions on the skin, holes are drilled in the pristine skins. The manual suggests drilling both sides of the rudder skin at once, firmly holding the folded skin to the table top. Then the ribs are positioned inside the skin, their marked centerlines visible through the skin holes, and matching rivet holes are drilled into the rib flanges. Once again, a regular forest of Clecos will be growing from the assembly. When working on the opposite side, two-by-fours will be placed under the rudder to allow the Clecos to clear the table top.
The nose skin is installed as a separate piece, requiring some trimming before marking and drilling. Once again, the nose skin is fitted and matching holes are drilled through the nose and tip ribs. At long last, it's time to start removing some of the 40 Clecos adorning the skin and installing rivets to complete the final assembly. Inevitably, a few holes will not match up closely enough to allow a rivet to be slipped through the material. In these cases, a tad of light drilling will open up the hole sufficiently.
| This Clecoed CH 601 rudder is ready for final riveting of the skin to the ribs. | 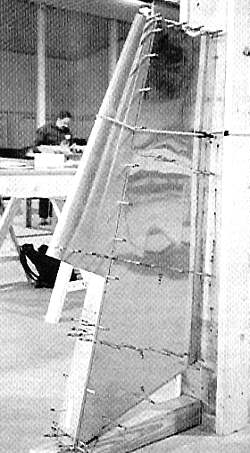 |
Proud Parents
As the rudder takes shape, the first-time builders take pride in their newfound skills and begin to feel confident about their ability to complete a kitplane. The initial fears have gone, to be replaced by planning for extra workspace, selling the project to bankers and spouses and reading brochures. Workshops are great morale boosters and an excellent way to test the water without making a huge upfront commitment. We highly recommend them.
