'SEVEN DAY WONDER'
ZODIAC AT SUN 'N FUN FLY-IN

Pictorial: BUILDING & FLYING AN AIRCRAFT IN ONE WEEK!

Following is a photo summary of the construction of a complete ZODIAC CH 601 built in just seven days during the annual EAA Sun'n Fun fly-in convention.
Summary and background information.


Day 1: Starting Assembly of the Horizontal Tail Starting at 8:30 am on Sunday, a crew of twelve eager (but mainly inexperienced) volunteers got started building the all-metal ZODIAC under the guidance of Mathieu Heintz, production manager. After a brief pep talk and introduction, work started on the tail sections and the wings.

[Construction starts on the horizontal tail spar]

Beginning with three flat tables, a big box of parts (a stock kit) and a single toolbox, volunteers and onlookers were both skeptical that within seven days those same parts would be a flying aircraft.

[Drilling the wing ribs to the spar]

Drilling the Wing Ribs to the Spar
Drilling the Horizontal Tail Skin to the Ribs By noon the first day, the assembled parts on the workbenches started to resemble parts of an aircraft.

[Drilling the skin to the horizontal tail]

After a brief pizza-and-soda lunch, volunteers started assembly of the center wing section.

Only basic hand tools were used, with several drills and riveters being used simultaneously.

[Positioning wing ribs to the center wing spar]

Attaching the Wing Ribs to the Wing Center Section
Attaching the Wing Ribs to the Left Wing Spar By the end of the first day, volunteers were so impressed with their progress that they joked with onlookers that they would by done by Wednesday!

[Riveting the wing ribs to the right wing spar]

On day two, the wing skins were positioned over the internal wing structure and later riveted together.

The ZODIAC uses blind rivets extensively throughout the construction - these are as easy to set as a "pop" rivet - a real time saver.

[Positioning wing ribs to the center wing spar]

Riveting the Top Skin to the Wing
Completing the Elevator Once the top and bottom rear wing skins were riveted in place, the pre-formed leading edge skin was positioned, drilled, and riveted to to nose ribs and main spar.

Volunteers proudly signed their names on the inside before riveting closed the wing sections.

Though volunteers had an air compressor at their disposal (to power a pneumatic riveter and drills) a lot of the assembly was done with a simple hand riveter.

The tail sections were completed and ready to install to the fuselage (yet to be finished).

While several staffers worked on the project, most of the actual construction was done by the volunteers (the staffers were busy answering questions and showing volunteers the steps and methods in the building process).

[The elevator has been drilled and is now ready for riveting]

Completing the Elevator
Putting the Fuselage Center-Section Together The center fuselage sides and firewall were attached to the center wing section.
On the third day, Mathieu Heintz admitted that "the first day was a disaster. We were slow getting started, but now I'm ready to hire all the volunteers full time."

The rear fuselage bottom was put together (three flat sides were joined), and later the rounded bulkheads were added on top.

[Duct tape held the fuselage sides in place, awaiting positioning of the top bulkheads]

The Wings and Fuselage near completion.
The Wings and Fuselage near completion. By day four, all the major sections of the airframe have been put together.

Simple all-metal construction was ideal for the outdoor workshop - since construction does not require a dust-free or temperature controlled environment.

Control installation was started in the cabin area before the seat and baggage compartment were installed. Working on the Cabin area
Chris Heintz (left) checks the engine mount installation The instrument panel and engine mount were installed.

Designer Chris Heintz (left) was on hand all week to answer questions about the design and construction. Here, he checked the engine mount installation.

On day five, the outer wing sections were attached to the fuselage center wing and the aileron controls were installed. Attaching the Wings to the Center Section (fuselage)
Tail Sections have been attached Volunteers discussed their workmanship after completing installation of the empennage.

The tail wheel was installed (this was a taildragger model).

The fuselage was turned over to complete installation of the landing gear. (The fuselage is not normally rotated, but it helped to have a dozen strong backs and twelve pairs of hands ). Turning the Fuselage over to install the Gear
Bolting on the Rotax 912 Engine The 4-cylinder, 4-cycle Rotax 912 engine (80-hp) was bolted onto the engine mount, and installation of engine controls, electrical system and liquid cooling system was started.
Mathieu Heintz (right) began installation of the engine controls for the factory-new Rotax 912.

A pre-wired harness system was used for the electrical system to save precious time.

Installing Engine Controls
Canopy and Engine installations By day six, the engine and canopy installations were completed. The wings had to be removed to get aircraft out of the workshop building. The crew worked well past sunset in preparation for the big day!
Bolting the wings to the fuselage Putting the wings back on and getting ready for weight and balance and final FAA inspection.
The final day arrived! The shiny unpainted metallic aircraft was pulled out to the flightline for engine run-up in preparation for the first flight (planned in just a few hours!) Chris Heintz enters plane for Engine run-up
Look! It Works... now will it fly? To the applause of the crowd, the new Rotax 912 roared to life just as soon as the fuel worked its way through to the dual carburetors.

[Running up the engine, with a few adjustments being made to the carburetor setting]

It was time for the maiden flight!
Chris Heintz hopped in the roomy cabin after satisfactory completion of the engine run-up and a thorough pre-flight inspection.

Initial skeptics were proven wrong as the aircraft was readied for its maiden flight scheduled for 1:06 p.m.

Heintz enters plane for the maiden flight
Getting ready for the first flight! The unpainted plane looked like an "unlabeled soup can" (according to the local Lakeland Ledger newspaper).

The Zenith Aircraft workshop was one of the busiest sites at the convention, with most visitors returning a second or third time to look in on the progress being made.

It flies!

At precisely 13:06, the brand new ZODIAC was airborne, becoming the 500th homebuilt aircraft registered at the Fly-In (according to Sun'n Fun organizers).
Departing to the east on runway 09, takeoff was less than 700 feet. Three circuits later, Heintz brought in the new aircraft for a smooth landing to the applause of the airshow spectators.

...and on the Seventh Day it flew
Volunteers and Zenair staffers have something to show for their 7-day effort Back on the ground, Heintz claimed the first flight "uneventful" and stated that the new plane performed very well.

The volunteers were proud to have completed the "Seven Day Wonder" on schedule, and relaxed Saturday afternoon (many of them watched the airshow for the first time on Saturday, having been too busy during the week to take in the show).


'SEVEN DAY WONDER'
ZODIAC AT SUN'N FUN FLY-IN

BUILDING & FLYING AN AIRCRAFT IN ONE WEEK!

At the EAA Sun'n Fun fly-in (Lakeland, Florida) during the week of April 18 - 24, 1993, aviation enthusiasts saw a complete airplane built, and flown, within a period of just seven days!

Kit manufacturer Zenith Aircraft Company supplied a complete kit and oversaw assembly of a complete Super ZODIAC CH 601 HDS aircraft at the 
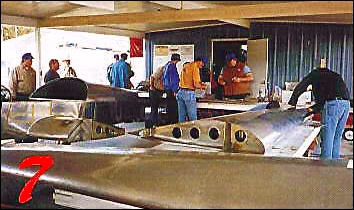
convention's sheet-metal workshop during the fly-in.

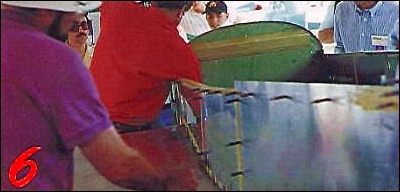
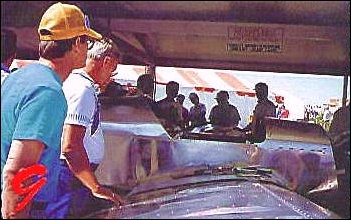
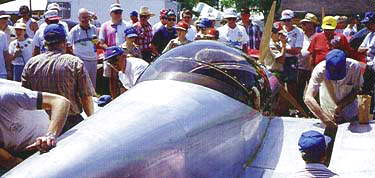
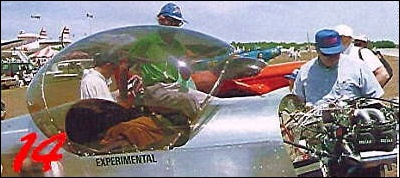
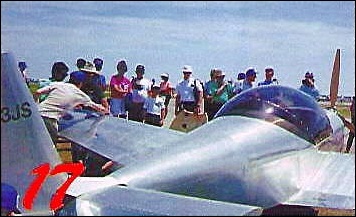
Visitors to the fly-in were able to see an aircraft come together before their very own eyes as staff and volunteers rushed to build and finish an aircraft in a week!

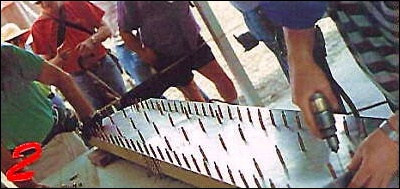
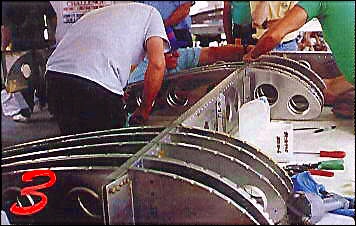
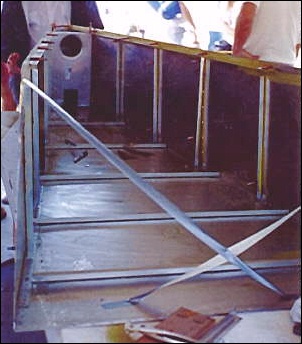
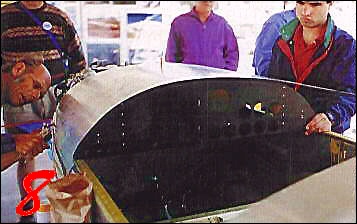
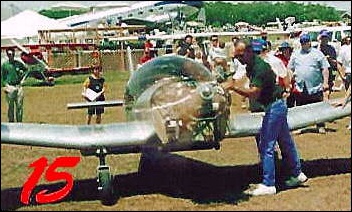
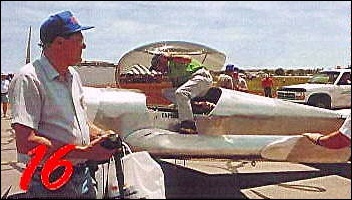
Assembly of the off-the-shelf kit started on Sunday, April 
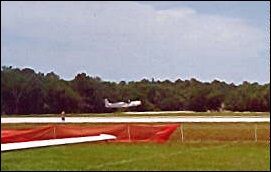
18, and continued through to the following Saturday, when the completed ZODIAC aircraft was flown on its maiden flight during the final airshow of the one-week fly-in. Chris Heintz, the aircraft's designer, had the honor of test flying the newly-built plane. 
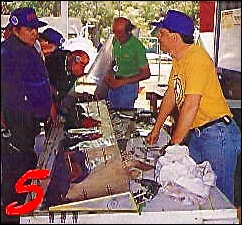
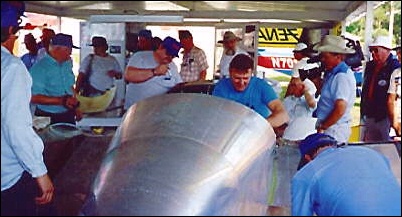
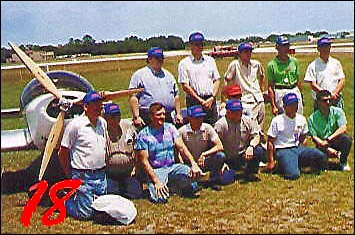
Zenith Aircraft staff volunteered their time in leading the assembly project, with the help of local volunteers.

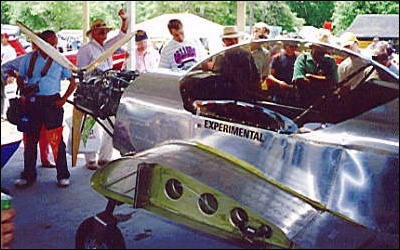
The Super ZODIAC CH 601, an all-metal kit aircraft designed by aeronautical engineer Chris Heintz, was chosen for this challenging project primarily because it is easy to build, utilizing a simple and proven all-metal assembly process.

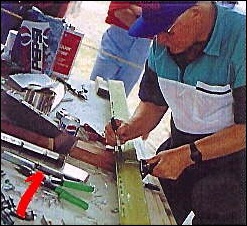
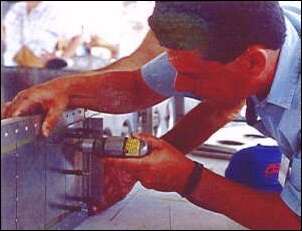
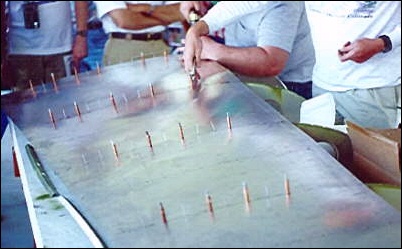
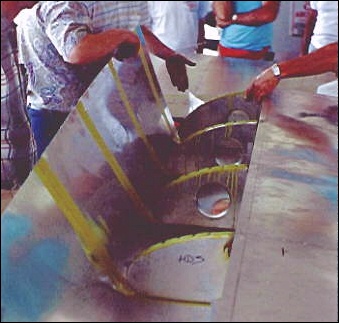
Building the ZODIAC kit required only basic tools, and did not call for jigs or special skills, making kit assembly quick and relatively easy. The metal parts that made up the kit are pre-formed at the Zenith Aircraft factory, ready for 
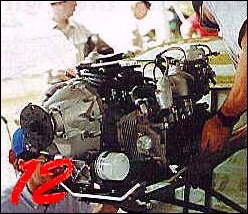
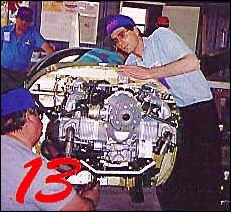
assembly. The ZODIAC aircraft was equipped with the 80-HP Rotax 912 engine and a basic factory panel. With the 80 horse-power engine, the sleek two-seater cruised at a brisk 135-MPH, burning less than four gallons per hour.

Having already successfully completed similar projects in the past, the kit company was confident that the aircraft would be ready to fly at the end of the week: In 1978, another Heintz design, the Zenith CH 200, was built in seven days at the Oshkosh Fly-In, and several STOL CH 701's have been assembled and flown at previous Sun'n Fun fly-ins, being awarded the show's "Best Workshop" by Sport Pilot magazine (1990). At the 1988 World's Fair in Vancouver, a complete ZODIAC was built in twelve days.

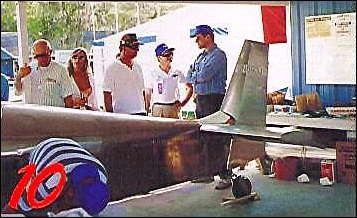
The educational project was an excellent opportunity for first-time builders and aviation enthusiasts to learn all about building and flying their own aircraft - by following the assembly of a complete aircraft in just one week. Designer Chris Heintz was on hand all week to explain the Zodiac's design and construction and to oversee assembly of the "seven day wonder".

Why does Zenith Aircraft sponsor "Seven Day Wonder" construction projects?
Chris Heintz explained: "We started it as a challenge: To prove that it could be done. Also, I think the construction project fills a void at the fly-in conventions - where there are only completed aircraft to see. This project shows visitors that it is possible to build an aircraft without special skills or tools, and allows them to follow the full construction of an aircraft during a single week - from start to finish."

"Building aircraft is what EAA [the Experimental Aircraft Association] is about - and this type of project shows the average fly-in visitor that he or she can build their own aircraft!" Explained Heintz. "While we all love to look at finished aircraft, one has to realize what is involved in getting the aircraft to its finished state.

"Obviously, the project is also an excellent promotional tool. It proves how quick and easy our kits are to assemble, and validates my claims about my designs' construction simplicity. I'm somewhat surprised that no other manufacturers have attempted a similar project, but maybe they're not as confident about being able to finish one of their kits within a week.

"We don't attempt a 'Seven Day Wonder' project every year: First, we've proven that it can be done, and it's also a lot of work to organize. When we're not doing one of these projects, we like to spend time at the workshop showing potential builders some of the basics in metal construction. During a seven-day project, I can't spend too much time talking with visitors - we have to concentrate on getting the project completed."

[Back] [ZODIAC CH 601]


Zenith.Aero: Online community for active Zenith builders, owners and pilots

New exclusive Zenith T-shirts from EAA!

 Zenith Aircraft Company

Zenith Aircraft Company
1881 Airport Road, Mexico Memorial Airport
Mexico, Missouri, 65265  USA.
Tel: 573-581-9000 (Mon - Fri, 8-5 Central),
Comments or questions? Click Here

© Zenith Aircraft Company: 2019-03-01